How to Grow Your Own Microgreens
Originally published March 6, 2023, revised March 1, 2026.
Microgreens are one of the easiest and most nutrient-dense foods you can grow at home. They add fresh flavor, beautiful color, and a boost of nutrition to almost any meal — salads, sandwiches, eggs, soups, grain bowls, and more.
I’ve been growing microgreens since 2018 — first for restaurants, then seasonally at farmers markets — and now I offer Microgreen Growing Kits for anyone who wants to grow their own. (They also make a fun and practical gift.)
Although the process is simple, questions often come up along the way. This guide walks you through each step and answers the most common ones.

What’s in the Kit?
Each Microgreen Growing Kit includes:
5 heavy-duty growing trays
4 trays for growing
1 tray to invert over sunflower shoots (to give them extra room and help loosen hulls)
Organic microgreen soil mix
Organic seeds for 4 varieties
The trays are reusable, so you can continue growing again and again. Refill kits are available in the farm store at the South Bend Farmers Market.
Step 1: Soak Certain Seeds
Sunflower and pea seeds should be soaked overnight before planting.
Rinse seeds in clean water.
Soak in a large container with plenty of water for 8–12 hours.
(They expand quite a bit as they absorb water.)
Radish and broccoli seeds do NOT require soaking.

Step 2: Prepare the Trays
Add about ¼ of the soil mix (roughly 1 cup) to each tray.
Gently pat it down to create a level surface.
Do not compact the soil more than necessary.
A smooth, even surface helps the seeds germinate uniformly.
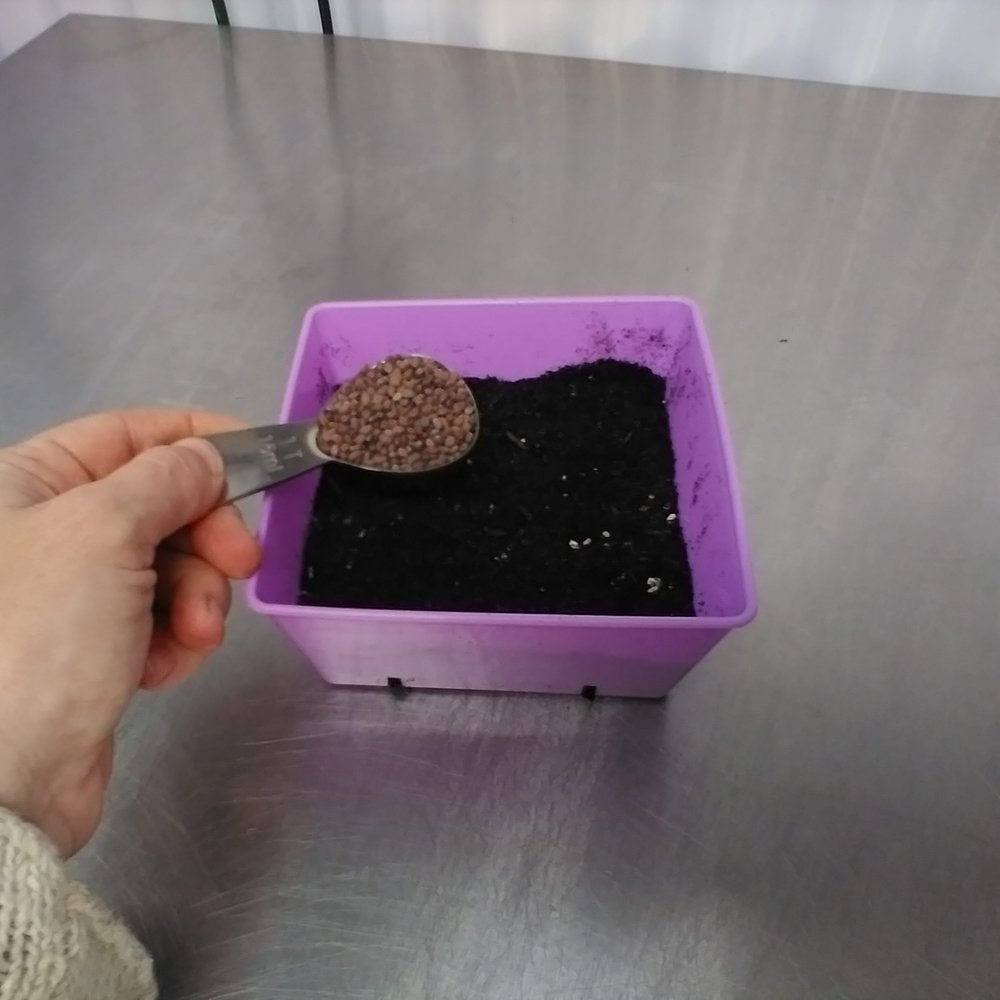
Step 3: Plant the Seeds
Each seed packet contains the correct amount for one tray.
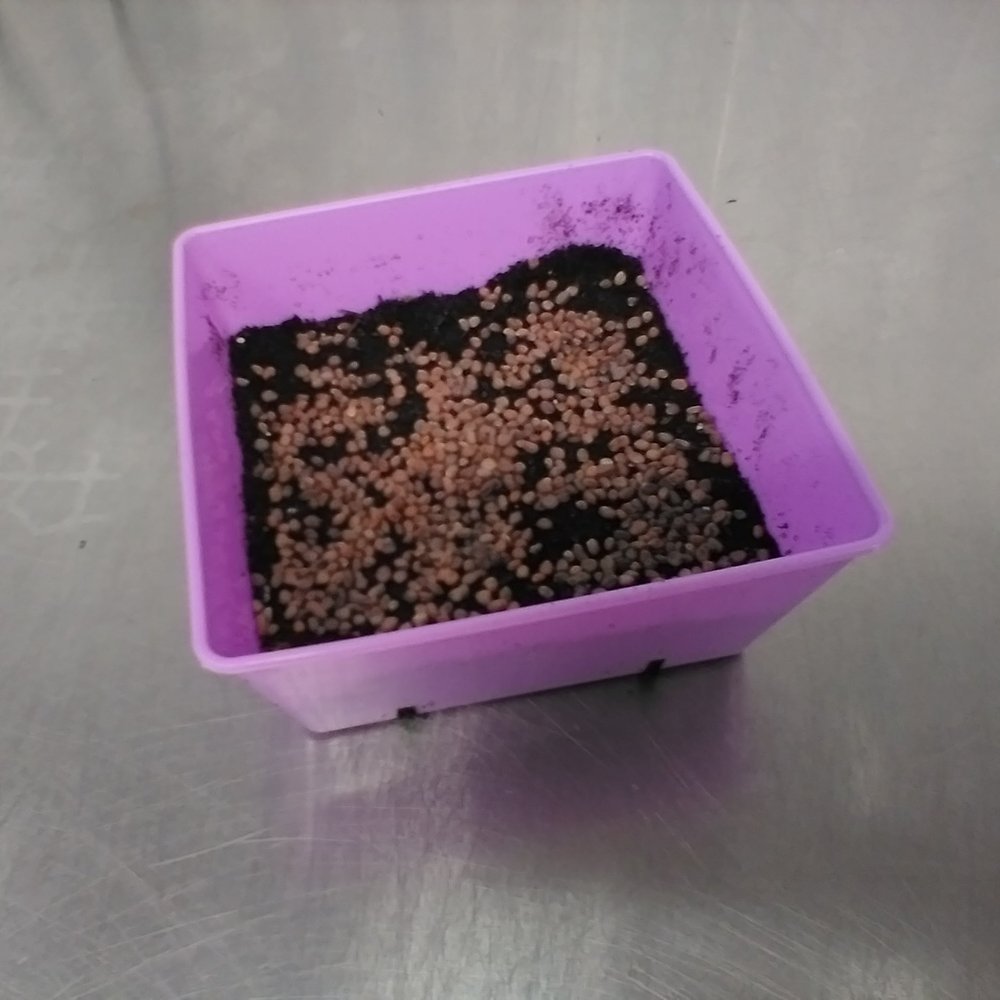
Scatter seeds evenly over the soil surface.
They will look dense — that’s exactly what you want.
Do not cover them with soil. Microgreens grow best right on top.
Gently mist the seeds after planting. Avoid overwatering or washing seeds to the edges of the tray — they should remain evenly spaced.
Place trays on a plate, pie dish, or cookie sheet to catch drainage from the bottom holes.
Step 4: Blackout Period
Microgreens need darkness to sprout.
Cover each tray to create a blackout environment.
If growing multiple trays, you can nest another tray on top — it’s fine if it touches the seeds.
A cutting board, cookie sheet, or plate works well too.
Check trays daily to ensure they haven’t dried out.
If planting day is Day 1, they are typically ready to uncover around Day 4.
Step 5: Move to Light
When uncovered, the seedlings may look weak and yellow. That’s completely normal.
Place them in:
A bright windowsill with as much direct light as possible
ORUnder grow lights (positioned fairly close to the plants)
Within a day or two, they will green up beautifully.
Water at this stage, but don’t keep the trays soaking wet. A small amount of water each day is ideal. If they begin to wilt, they need more moisture.

Special Tip for Sunflower Shoots
On the day you uncover sunflower shoots:
Water them well.
Lightly mist the tops.
Cover with an empty inverted tray for one additional day.
This extra dark, humid period helps loosen hulls and allows the larger shoots to expand.

root hairs on radish microgreens
“Is That Mold?”
insert close-up photo of root hairs
Many microgreens develop tiny white root hairs during sprouting. These are often mistaken for mold.
Root hairs:
Appear fuzzy
Grow evenly along the root
Are completely normal
If you’re unsure, mist the area lightly with hydrogen peroxide.
Mold will fizz. Root hairs will not.
Harvesting
Most microgreens are ready to harvest around Day 8–10.
If kept well watered, trays can last about a week, allowing you to harvest what you need each day.
A Note About Sunflowers
Sunflower microgreens are best harvested at the cotyledon (seed leaf) stage.
Once true leaves begin forming:
Flavor becomes slightly bitter
Texture becomes tougher
If true leaves appear, harvest the entire tray and store in an airtight container in the refrigerator.
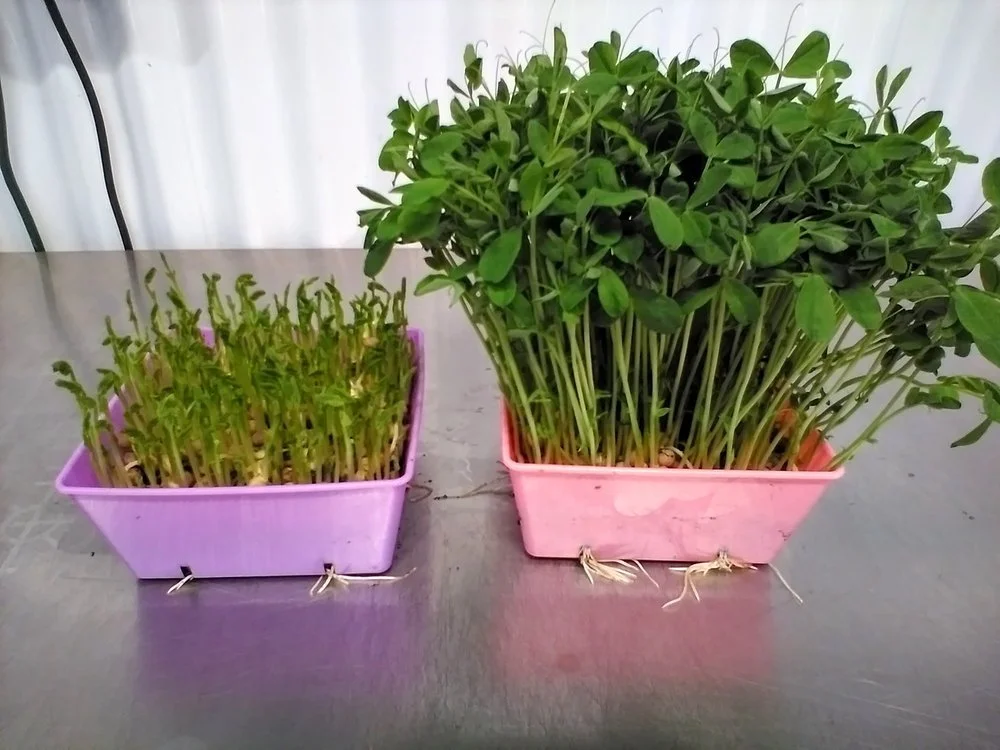
pea shoots coming out of darkness and pea shoots ready to eat
How to Harvest & Store
Use scissors or a sharp knife to cut just above the soil line.
Store in bags or jars in the refrigerator if not eating immediately.
They’ll stay fresh for several days when properly stored.
Quick Review
Moisten growing medium
Fill trays evenly
Pre-soak peas and sunflowers
Scatter seeds on top (do not cover)
Cover trays for blackout
Check daily
Uncover around Day 4 and move to light
Water lightly each day
Harvest around Day 8–10
Don’t allow sunflower micros to grow true leaves
Store in refrigerator if needed
Growing microgreens is simple, satisfying, and surprisingly productive for such a small space.
Fresh food. Grown right on your counter.
Enjoy. 🌱
